Whether you’re into a full BDSM relationship or just like to experiment, you’re sure to be aware of the thrill that spanking brings to a relationship. While there are many ways to go about spanking, having a spanking bench can really ramp things up. These devices allow you to enjoy different positions and experiment with bondage. You can certainly purchase a spanking bench but if you’re a crafty person, you can actually create a DIY spanking bench on your own.
In this guide, we’ll walk you through a detailed guide to create a 2′ wide by 4′ long spanking bench, including links to all of the necessary materials and detailed instructions. If you decide making a bench isn’t for you, feel free to check out our choices for the best spanking benches that you can buy.
Types of Spanking Benches
Spanking is a normal part of consensual relationships, despite the fact it isn’t often talked about Trusted Source Finding the Courage to Reveal a Fetish I was thunderstruck. For as long as I remember, I’ve been fairly obsessed with spanking. www.nytimes.com . However, if you want to add more kink to your relationship, know you aren’t alone and it isn’t anything to be ashamed of.
First, be aware that there are different types of spanking benches and not every type will work for you. You may want to think about what you have enjoyed in the past or what you want to experiment with before taking the time to make one.
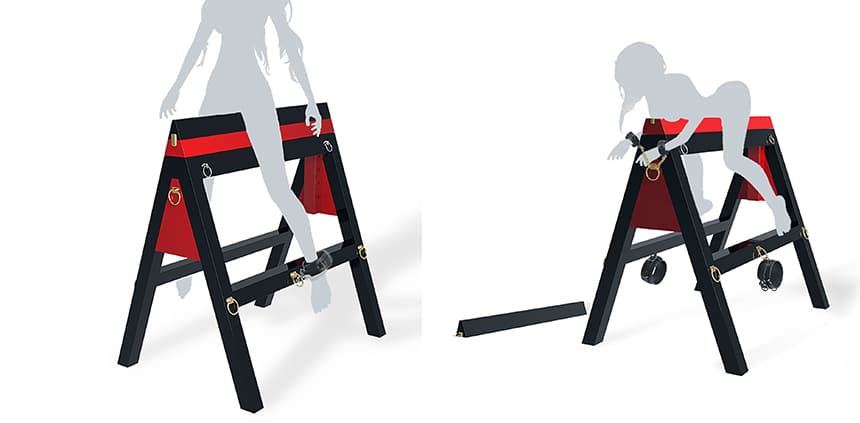
Sawhorse
For those that like to stand and bend over while being spanked a sawhorse is a good idea. This way the height is appropriate although you may have to adjust it if you are on the shorter side. Furthermore, you will probably want to add padding, as sawhorses can have untreated wood that poses a splinter hazard.
With a sawhorse you can be bent over it or you can be strapped to the top with your legs and arms over each side. However, you will want to try a few positions as it may be too uncomfortable to withstand prolonged times on it.
Traditional Bench
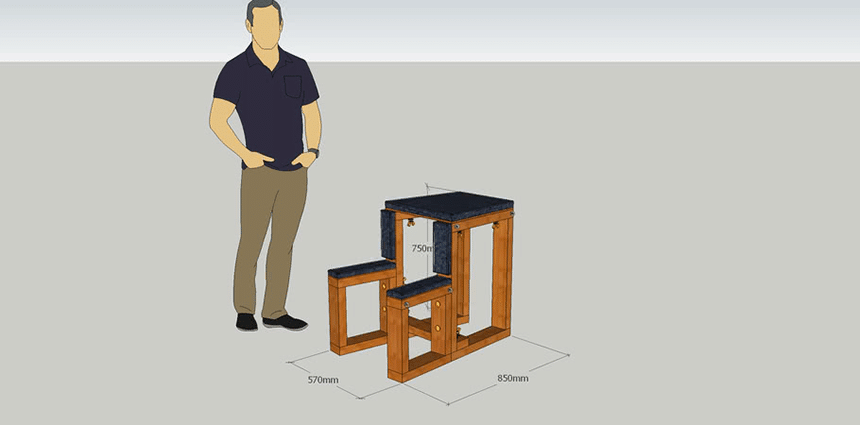
This is perhaps the simplest spanking bench design, as it is quite literally a bench. Think a padded stool that is large enough for a person to drape themselves over. You can also consider height as you may want to be lying completely down while being spanked or merely standing and bending over. For inspiration, check out the PADDED SPANKING BENCH which comes complete with an area to hang up all your accessories.
Most people have benches at home, whether for storage for resting your feet, so it’s an easy way to get into the world of spanking.
Reverse Bench
A reverse spanking bench offers the option of the top being able to move. You can adjust the angle to whatever suits you. This possibility is beneficial if you want to keep your legs in the air and add a more exposed element to the process of spanking.
Birching Horse (Saw Horse)

With a birching horse, the person being spanked is made to lie on top so that their legs dangle from either side. Think a sawhorse but with a narrower top. It is taller, so your legs may not be able to touch the ground, and its construction allows for arms or legs to be tied to the sides.
What You Need to Make a Spanking Bench
Here are the materials that you will need to create a 4 foot long, 2 foot wide, 28″ high spanking bench based on our plans. Feel free to adjust the materials based on any design changes that you’d like to make.
Click here to view the full shopping list on Amazon
Bench Materials
- 3 pieces of 4 foot long, 2×4 lumber (note that 2×4 lumber is actually 1.5″ x 3.5″) – view our recommendation
- 2 pieces of 2’x2′ plywood – view our recommendation
- 4 L Bracket Corner Braces – view our recommendation
- 1″ X 24″ X 84″ Upholstery Foam – view our recommendation
- 5 yards of upholstery fabric or vinyl covering – view our recommendation
- 28″ High Metal Table Legs – view our recommendation
Tools & Other Supplies
- Screws – view our recommendation
- Power Drill & Bits – view our recommendation
- Hand Saw – view our recommendation
- Upholstery Staple Gun & Staples – view our recommendation
Measurements

The plan that we’re going to cover is for a 2 foot wide by 4 foot long bench that will be attached to 28″ high legs.
If you’d like a different sized bench, you can adjust the materials as needed to create a bench with different dimensions.
For length, think about if you want your subject spread over the entire top or just bent over it. For width, think about how comfortable you want your spanking subject to be. And finally, for height, think if you will be placing your bench on a separate sturdy surface or if you want it to stand alone on its own.
You may want to make a protype first out of cardboard to see how it will look. Don’t forget to do your research and see what type of spanking benches there are. For example, the Master Series Obedience Extreme Sex Bench has areas to rest your arms and legs. While this is a more elaborate design, you if you are especially crafty you may want to try adding on to your DIY creation.
How to Construct the Spanking Bench
The following are basic steps for your DIY spanking bench. They can be followed as-is or you can modify them more towards your needs. Everyone will be different, but this will give you a rough idea of the process.
Step 1. Preparation
Preparation is key, so start out with solid plans and a materials checklist.
As discussed earlier, we will be covering a 2′ wide x 4′ long bench on top of 28″ legs, but you can adjust these plans as needed if you’d like a bench of a different size.
Step 2. Cut 2×4’s to size and sand each piece

2×4’s will make the foundation of your spanking bench. If you’re sticking with our plan, the two long ends of your bench do not need to be cut. The only steps you need to take are to cut one of the 2×4’s in half so that you have two 2′ long pieces.
You should have 2 4′ long pieces, and 2 2′ long pieces.
Lightly sand each piece so that all surfaces, edges, and corners are smooth.
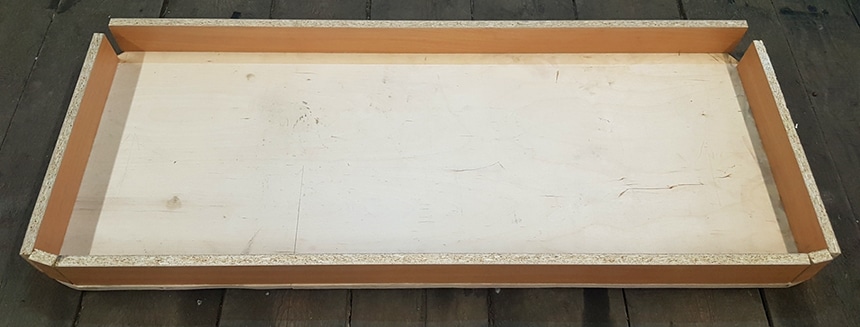
Step 3. Attach 2×4’s to create a rectangular frame

To start, place your 2, 4 foot long pieces together with your 2, 2 foot long pieces. The long pieces should be placed outside of the short pieces.
Mark and drill pilot holes for your screws through the face of the long pieces of wood and into the ends of the short pieces. We recommend 2 screw holes per corner.
Use your drill and screws to attach the frame together.
Step 4. Attach plywood to the rectangular frame
Next, line up the plywood pieces on top of the frame that you’ve created.
Drill pilot holes for your screws through the face of each plywood piece and sides of the frame.
Use your drill and screws to attach the plywood pieces to the frame.
Step 5. Strengthen the corners of the frame with L Brackets
Add an L Bracket to the inside of each corner using your drill & screws. Again, we recommend drilling pilot holes before adding the screws – this will help prevent your wood from splitting.
Step 6. Attach the bench top to the metal legs
Line up the bench top that you’ve constructed onto the metal legs.
Drill pilot holes, and then use screws to attach the bench top to the legs. You should be drilling the screws downwards from the top of the bench so that there isn’t a risk of the screws poking through the top of the plywood.
Step 7. Add padding and upholstery

There are many types of materials you can use for padding. Memory foam works really well as it contours to the body. Old fashioned upholstery foam is also a great option, and a cheaper one, too. If you have cushions or a thin mattress, you may be able to use this as well.
Just make sure nothing is lumpy, and you should choose a material that’s water resistant and durable.
To start, cut your padding down to the size of the plywood bench top that you’ve created.
Once you your padding has been cut to size – make sure that you leave enough extra material so that each side of the frame can be completely wrapped around to the back side. You can always cut off extra material after stapling, so don’t cut too much to start!
Use your staple gun to attach the upholstery material to the inside/back of the bench top.
Finally, cut off excess material on the back side so that extra upholstery material is not hanging down.
Step 8. Finishing touches
Your spanking bench is complete but you will want to add personal touches. Many benches have a place to hang accessories on the side so they are always in close proximity. Many people choose to screw eye-bolts into the sides of their bench – here’s our recommendation for bolts that are both strong and easy to attach.
We also recommend adding spanking paddles and whips into the mix!
What Can You Use to Substitute Spanking Bench?
Whether you just aren’t the DIY kind of person Trusted Source Are You A DIY Type of Person? | Soar to Success Are you a DIY kind of person? I have always been strong-willed, do-it-yourself kind of person. Especially when it comes to saving money. I mean, who doesn’t like a savings! I guess it started when I was young, learning much from my father who was a jack-of-all trades, master of many. soartosuccess.eliteexpertsnetwork.com or you want to try out a few options first, there are many substitutions you can find right around your own home.
Coffee Table
Most people have a coffee table and in a pinch, it can work as a spanking bench. There are two issues with this idea, though.
The first is that not all coffee tables are made to take the weight of a person. You may want to test out the weight first, as you don’t want to hurt yourself by falling through the table. Second, coffee tables are usually made out of wood or glass, which can be quite uncomfortable to lie on. If you don’t want to add discomfort to a good spanking, we suggest putting down a pillow or blanket to add some extra padding.
With proper cushioning you can have a discreet BDSM equipment standing right in the middle of the room. You can also make your own coffee table/spanking bench using a bit of a craftsmanship:
Massage Table
A massage table is an excellent substitute for a real spanking bench as it already comes padded. You can lay down however is most comfortable and know you will be fully supported. Furthermore, most massage tables have face holes, which could add a fun element of sexual acts.
Inversion Table
Those that have back pain may have tried an inversion table. These devices work by strapping you in, both around the legs and the chest, and then flipping over so you hang upside down.
You can use an inversion table for spanking but instead of lying down so your back is at the table, lie down so you face the front.
You can then choose whether to remain upright or to use the inversion capability of the table and be flipped so you are upside down while being spanked.
The one caveat to watch out for is if you are facing towards the board, it will be harder to breathe. Move around a bit to find a comfortable position and be sure to use safe words if the momentum becomes too much.
However, if you are used to using ball gags, then having your mouth covered may be a fun part of the whole experience.
Sex Swing

Sex swings are versatile pieces of equipment and can definitely be used for spanking. The problem, however, is that spanking requires force and with a sex swing, that force can be lost in the momentum of the swing.
For a proper spanking impact, you will need to brace the swing against something. Try strapping the swing to a table and if necessary, add some restraints. You might have to play around with your sex swing a bit but if you get it right, the whole apparatus will add a bit of suspension into your spanking sessions.
Final Thoughts
There are many ways to bring a bit of spiciness to a relationship and spanking is one of those. Whether you enjoy spanking as a form of punishment or as part of pleasure, the use of a spanking bench can bring the act to a whole new level.
There are many ways to create your own spanking bench and many people simply use a coffee table or even a secured sex swing.
However, if you want a device that is specific to your needs, crafting a DIY spanking bench may be what’s best for your relationship. All you need is some wood, nails, padding, and fabric and you can create a spanking bench exactly how you always dreamt of. Take the next weekend off and craft your way to a more fulfilling life in the bedroom.


